Saturday, November 26, 2011

Gluing the bow pieces

The final component of the hull panels is gluing on our funky shaped bow piece.


These glue on with butt blocks just like the joint in two main panels. We didn't glue the joint along the point because we couldn't come up with a good way to clamp it. After the main joint is cured everything should be held in place enough that we can get at the remaining edge joint.


Since the hull sides were out and we were mixing up glue anyway, we moved on to cutting the backing pads for the lashing connections between the hulls and cross beams. These are glued to the inside of hulls and support the lashing pad bolts.


Glued in place with a small fillet except where the bulkhead will sit flush along one edge. These were pressed in place and stapled from the under side which proved to be adequate for holding them in place.


Here are all four hull panels assembled with backing pads glued on lounging in the sun. Just add sheer stringers and these are ready to stitch!


Thursday, November 24, 2011

Rudder lashing points

We aren't going to have the weather to epoxy the hull panels, stems, and bulkheads into their final shape until the spring, but we want to get everything stitched and ready to go before tucking them away in the basement for the winter. As soon as both hulls are stitched up and ready we will move on to the beams and mast for the duration of the winter.

We had already shaped the profile of the 1/2" plywood stems with patterns and the router table, but had saved the handles for later. First we used the drill press to create a pilot hole for the pattern bit and then cleaned out the handle. The bottom of the handle is cut to line up with the top of the plywood deck when everything goes together. The other divergence from the plan shape was to draw the front of the handle to flow into the 1/2" tall fir stringer that goes down the middle of the fore deck.


Here is how the rudders and rear stems fit together (the rudders haven't been routed to final shape yet). Wharram uses a unique lashing method instead of pintles and gudgeons which is very clever and light weight. We picked up the idea of over drilling the lashing hole locations and filling with epoxy from Scott Williams' blog and will be doing that on our boat as well.


The plans don't locate the lashing points exactly so we just eyeballed what looked right and marked the center lines on both stems and rudders.


We measure back for the center of the row of lashing holes . . .


and drill out each end with a 3/8" drill bit . . .


then use a coping saw to cut out the slots which are filled with an epoxy and wood flour mixture and set aside to cure. Now when we drill out the lashing holes there will be no way for water to get into the plywood end grain.


Monday, November 14, 2011

Gluing hull panels - round 2

This was our second try at gluing the hull panels together with butt blocks and it went much better which means we are learning. (always a good thing!) This time we used clear packaging tape instead of blue painting tape on the backing boards which releases better. We also used more screw clamps and less thickened epoxy both of which made a cleaner glue joint as well.


We got nice even glue squeeze out but without all the excess glue that made such a mess last time. The round corner of our epoxy squeegees left a nice fillet along the edges.


Then we left them out in the sun to cure. My dog, Cash, decided to help guard the wet epoxy to keep falling leaves and bugs away.


After a couple hours they were set enough to move but still pretty soft so we transported them down to the basement and put the halogen work lamps on them.


Now all four hull sides are ready for the bow panels and sheer stringer. That leaves cleaning up the stems and bulkheads we're ready to stitch everything together.

Sunday, November 13, 2011

Making new bow panels

It's been almost two months since we worked on the boat last. Between weather, busy schedules and a bit of burn-out we needed a good break. Yesterday we finally got going again and not only made significant progress but proved that our skills are improving.

Last time we caught a mistake we made in measuring the bow panels using the right measurement from the wrong reference point. As a result we cut the angle too steep and made the bow triangle piece too small. Here you can see what we cut and the line that is what we should have cut.


So that leaves us with this weird shape for a new bow panel.


A quick go with the Japanese pull saw and here is our new bow panel. We then used this piece to mark and cut the other four panels. We're a little worried about the narrow point breaking when the panels are stitched but hopefully the epoxy will hold it all together


Next, all four panels got two coats of epoxy on their inside faces making sure we had two 'lefts' and two 'rights'. All told it only took 2 hours and we were back on track. 

Next up for the day was gluing the last two of the main hull panels, but we'll save that for the next post.


Saturday, October 1, 2011

Rain, rain, go away

A string of rainy weekends in combination with a ban on epoxying in the basement (the wife's not a fan of the permanent epoxy drips already on the floor) and being busy with school on weeknights means we haven't made much progress on the Hitia.

If we get a break in the weather I'd like to set up the router table outside and trim down the stems, rudders and bulkhead framing in preparation for stitching.

We're as antsy as you to get more done and post more pictures so hang in there with us. Got to get the hulls fiberglassed before the snow starts falling!


Sunday, September 11, 2011

Sanding and gluing

We had hoped that this would be the day to get the hulls ready for stitching but that was not to be. The day started with a trip to the store for 80 grit sandpaper and sanding the insides of the hulls.


The sanding seemed to take forever, but by lunch time all the hull panels were done.


Finally time to start gluing!! We cut up some scrap pieces of spruce from my oar project to make drywall screw clamps. the bottoms get a piece of tape to release from the epoxy. You definitely want to make sure you have enough ready BEFORE you start gluing.


The gluing surfaces, including the butt block, get a coat of raw epoxy. Once the epoxy went tacky we mixed up epoxy with milled glass and silica to mayonnaise consistency and slathered up the butt blocks.


Here it is clamped in place with the screws and wood clamping washers. I later added a spring clamp here and there to help along the edges.

It looks like everything is flush, we'll see when the screws come out tomorrow. I've learned my lesson about waiting too long to scrape off the excess glue, so I'll be checking in regularly to see when they are ready.


We only had time to do two hull panels, so from now on one hull may be a step ahead of the other.

Saturday, September 10, 2011

An early end to my sailing season

Last weekend, after a nice morning of working on the Hitia's bulkheads, I took my wife out on our sailing dinghy named Tipsy.


Here is the beach that we usually launch from, this was a much calmer day.


The wind was a good 12-14 knots and it was some exiting sailing until we broke a lee board and then very soon after broke the other. That left us trying to sail home (straight upwind) with no foils and making a tremendous amount of leeway. I was very glad to have a set of oars on board to row home, even if they were the dinky 5' pair that came with the boat.


It was so stressed that the ply layers separated down by the tip!


They were just a piece of 1/2" plywood with mitered edges, nothing fancy or efficient so I wanted to make new foils anyway. So now i have two projects moving to the top of the pile for the winter: make a nice pair of foils and finish the pair of 8' oars I have glued up.

Tuesday, September 6, 2011

Improved deck supports

The deck curve at bulkhead #2 is a full 1" which means that our 1" wide deck supports would be too thin on the ends to offer any support. You see the outline of the 1" support against the curve at the top of the bulkhead here.


I could have just added a strip at the bottom to make the whole piece taller, but I thought i would do something a little stronger and lighter. I actually gave the solution away in the first photo, it's the triangular pieces on the far right. They will fit below the full length strip making the whole piece about 1" thick and orienting the grain properly at the edges. Not as fancy as laminating up a curved support but more than enough for a stitch-and-glue beach cat.

I started by marking out the shape on a scrap strip of the 1" x 1/2" fir.


I wasn't sure how to cut this at first, but finally decided to just do it by hand with my new Japanese pull saw. The more I use that saw the more I think power tools are over rated.


And here it is all glued up and again held with staples. Staples aren't the prettiest, but it worked and it's all going to be painted later anyway.


Finally, here it is with the glue dried and two coats of epoxy.


One more afternoon of glueing and all the bulkheads will be assembled and coated. I'll trim the top edges on the router table and they'll be ready for stitching into the hulls.

Sunday, September 4, 2011

Deck and floor supports

It's a beautiful day and I'm long overdue for an afternoon of sailing, but first time to keep moving forward on the Wharram. It seems like a good day to glue the support pieces on some of the bulkheads so lets get to it.

The deck and bulkhead supports are made of the 1" x 1/2" fir we ripped earlier. Each one was measured against the bulkhead and then cut to length. Here they all are labeled and ready to go.


I only have the saw horse space (and motivation) to do bulkheads 1, 3 and 6. The bulkheads and fir strips are laid out and the gluing surfaces coated with raw epoxy.


The strips are coated with thickened epoxy and pressed into place.


Wharram suggests temporarily clamping with nails, but I'm afraid the fir would split and I don't have any drywall screws short enough so I used staples instead.


Once the glue is firmed up I'll scrape out the excess and probably give the unfinished sides their two coats of epoxy.


My little dinghy is getting jealous of all the attention spend on this new bigger boat, so now I'm off to the beach to take her for a quick sail.

Tuesday, August 30, 2011

Cutting stems and rudders

Time to keep this project moving. One of the many tasks between us and stitching up the hull sides is cutting out the stems and rudders. Having learned our lesson cutting out the 4mm panels, we layed out all the templates carefully to conserve as much space as possible and followed the plans exactly. Smile for the camera, Cam.


Hopefully that means we won't have any trouble in the future. Next we used a scrap board with a nice straight edge as a guide for the circular saw to put as clean a cut as possible on the rudder to stem edge while we cut it.


We used the same technique to cut the long edges of all four stems and both rudders. Next we cut out a rectangle that will become the backing pads for the beam lashing points. Had to double check the math to make sure we allowed for the right number of saw kerf widths but it should be just right. Next time the table saw is out we can rip it down to final width and then cut it up into our blocks.

I'd be nice to have everything ready to stitch at the end of the weekend. Not sure if that is doable but it's a nice goal.

Saturday, August 27, 2011

Halfway done coating bulkheads

The hull panels have been drying in the eves of the basement and are just itching to be sanded and glued together.


Over the week I made some steady progress coated a couple of bulkheads a night after work. Now all the bulkheads are covered on one side. By next weekend they should all be coated and maybe have the floor and deck supports glued on as well.


New England is bracing for hurricane Irene. The rain is going to start in a few hours so we can't do much this weekend. One day I'll have a proper workshop and a measly tropical storm won't have to slow me down.

Tuesday, August 23, 2011

Epoxy coating hulls

So after a very busy day of cutting and routing the plywood pieces, here is where the project stood on Sunday morning. Six pairs of bulkheads with their corresponding templates, four bow panels, one pair of hull panels trimmed to final shape and three pair of hull panels roughly cut.


I wish we stopped to take photos of the next part because it was kind of clever, but i'll describe it instead. In order to hold the good hull sides to the rough cut pieces during the routing we used a staple gun around the edges instead of two sided tape like we had been using on the bulkheads. This turned out to be very quick and stable and the bottom edges are going to be heavily epoxied and fiberglassed anyway because of the stitching later on.

After the SNAFU with cutting out extra bulkheads we took the time to lay out all the panels on the lawn and identify which sides to determine the inside and outside for each piece.

That meant it was time to break out the 5 gallon jug of West epoxy and start coating. Every internal surface gets two coats of epoxy hot on hot so that they will bond chemically.


The okoume turns a very pretty reddish brown when coated in epoxy. It's almost a shame we're going to paint it.


After the first coat the panels were moved to the shade to cure until tacky to the touch. The timing worked out perfectly so that after we gave each of the eight panels one coat, the first was ready for the second coat.


After round two of epoxy the panels were brought down to the basement to dry over night. We didn't have time to do the bulkheads so those will have to wait for another day.

Saturday, August 20, 2011

Two steps forward, one step back

The day started with a run to the lumber store at 7:30 and ended 12 hours later with all the hull panels and bulkheads cut and lumber sawn to dimension. But in our haste to get as much done as possible we also cut twice as many bulkheads as needed. The extra bulkheads can be salvaged for a lot of small parts, but we'll need at least one more sheet of 4mm ply, maybe two.

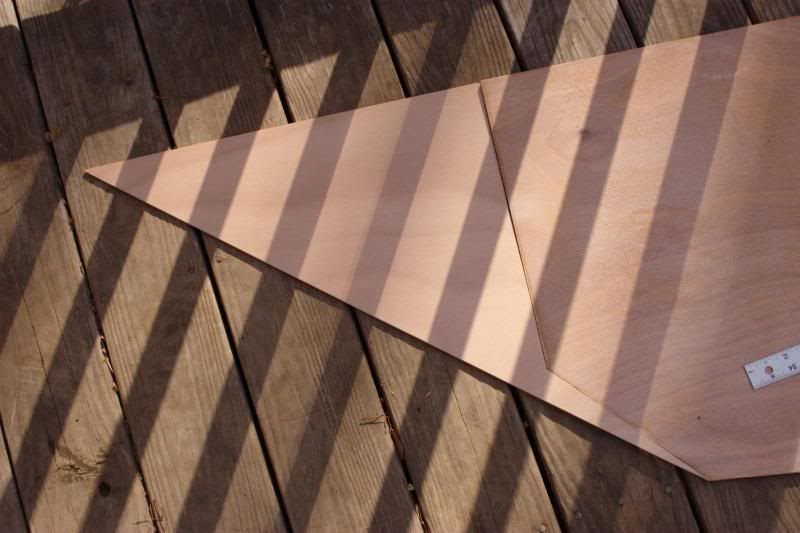
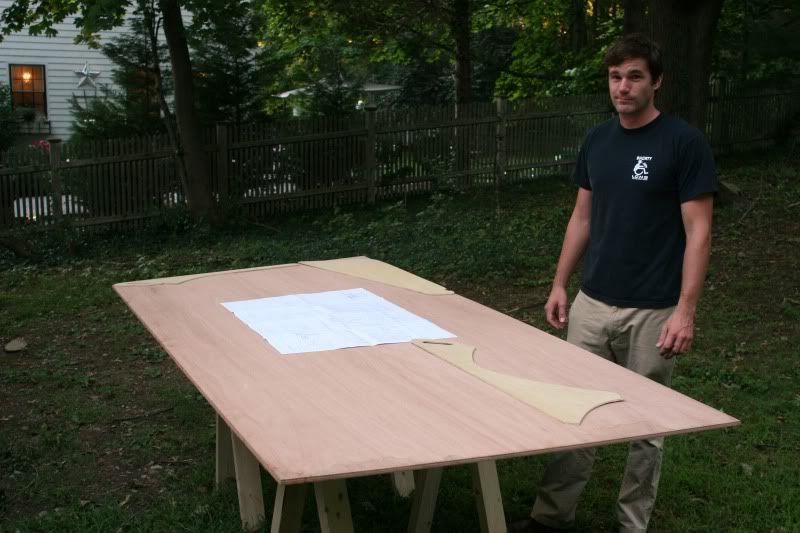
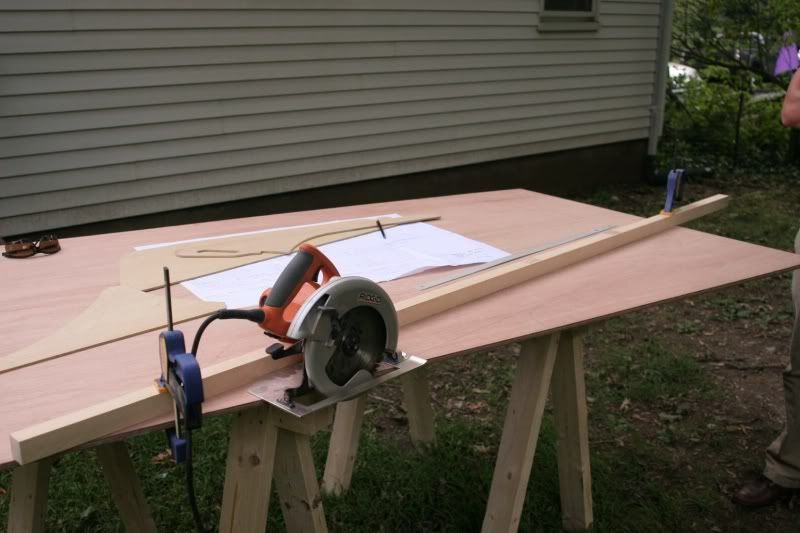
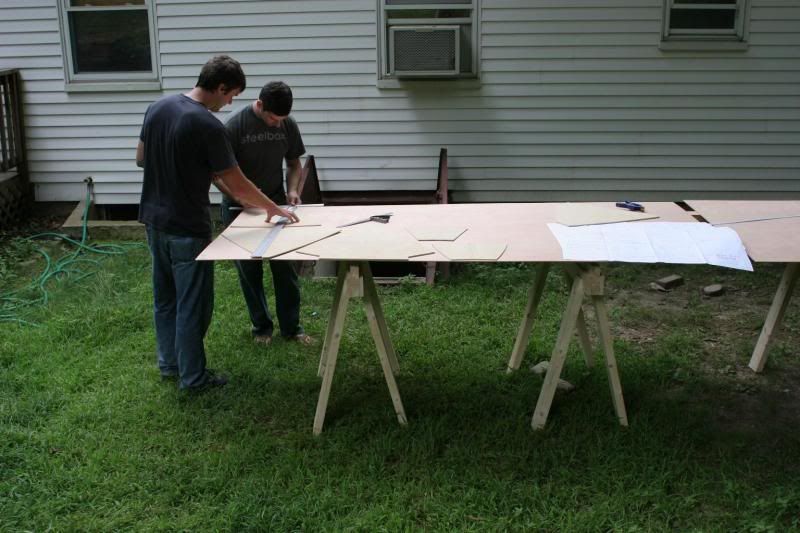
Everything began by laying out two sheets of the 4mm okoume plywood end to end and marking out all the measurements for the front and rear hull panels.


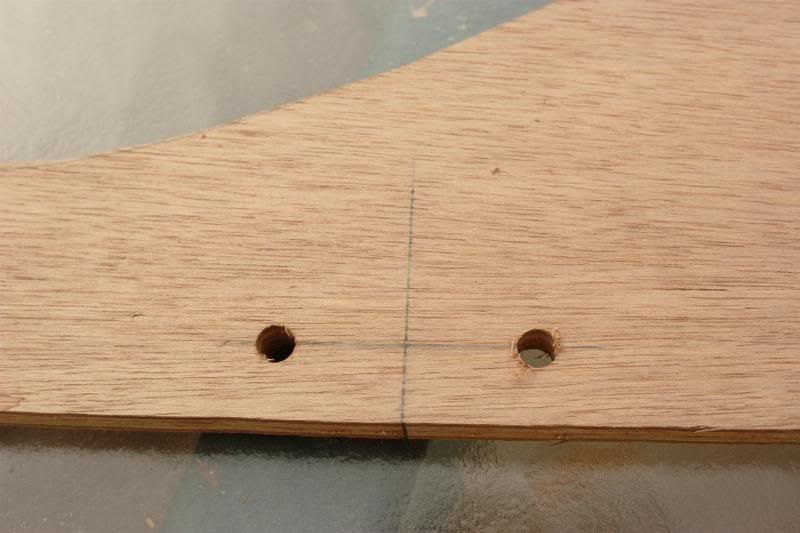
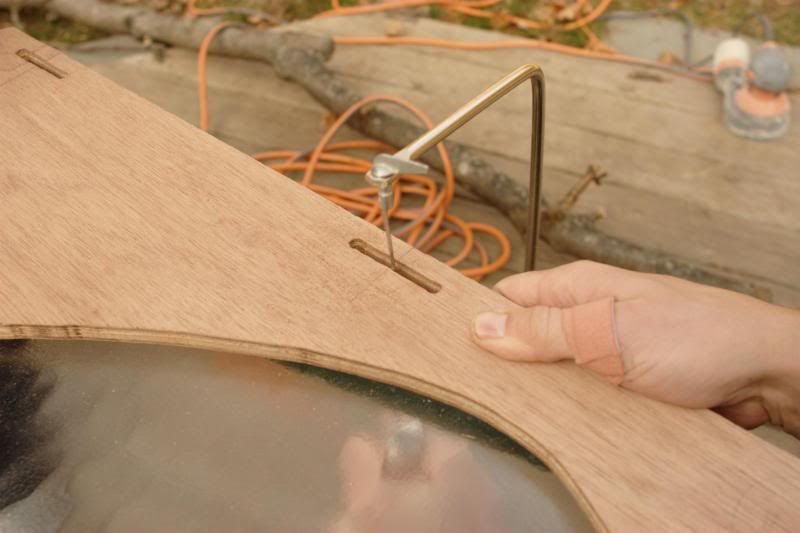
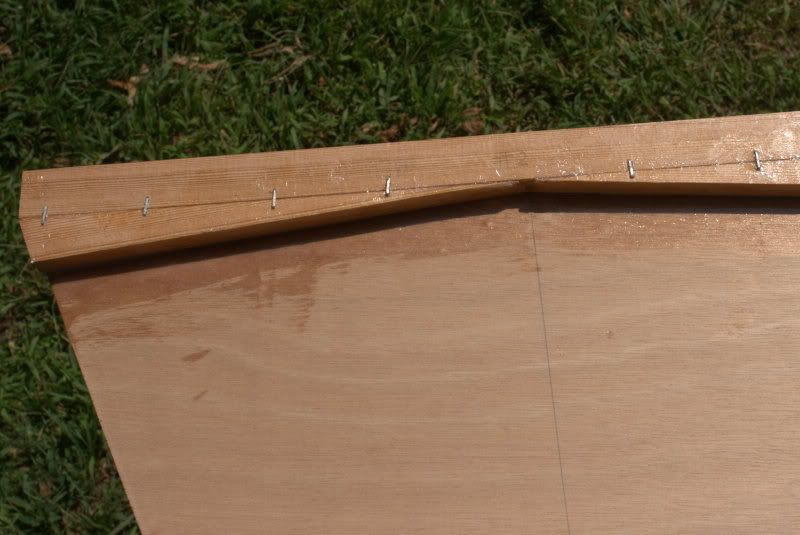
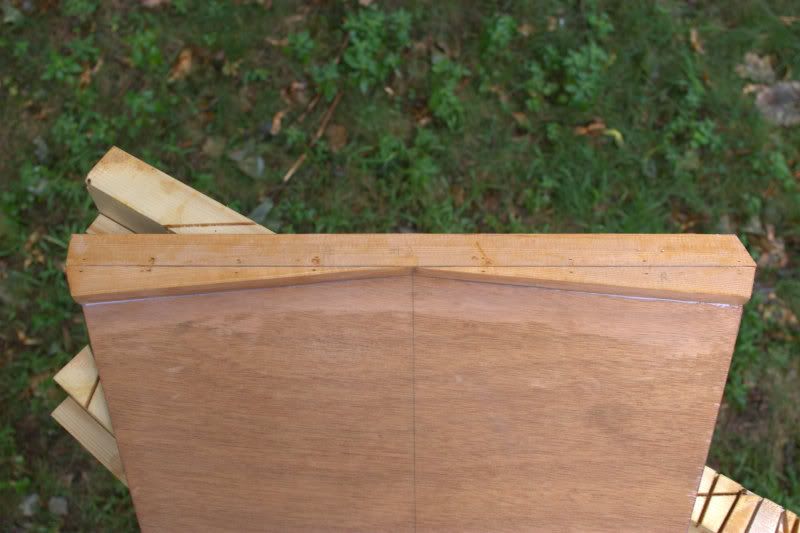
It took some double checking to get the outline and bulkhead locations to all agree, but pretty soon we had a batten through all the marks and could see hulls taking shape.


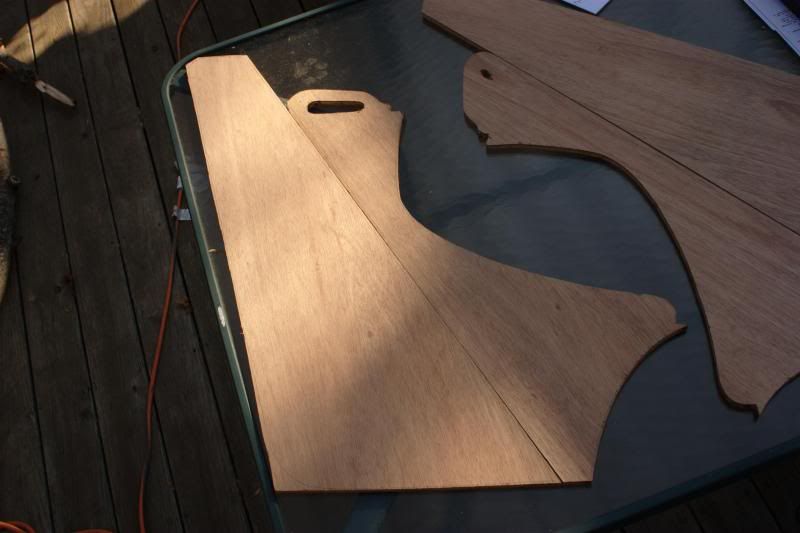
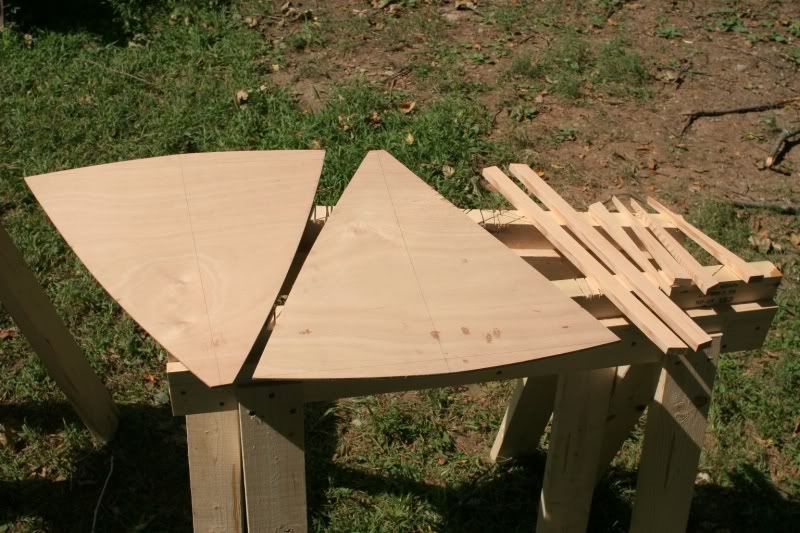
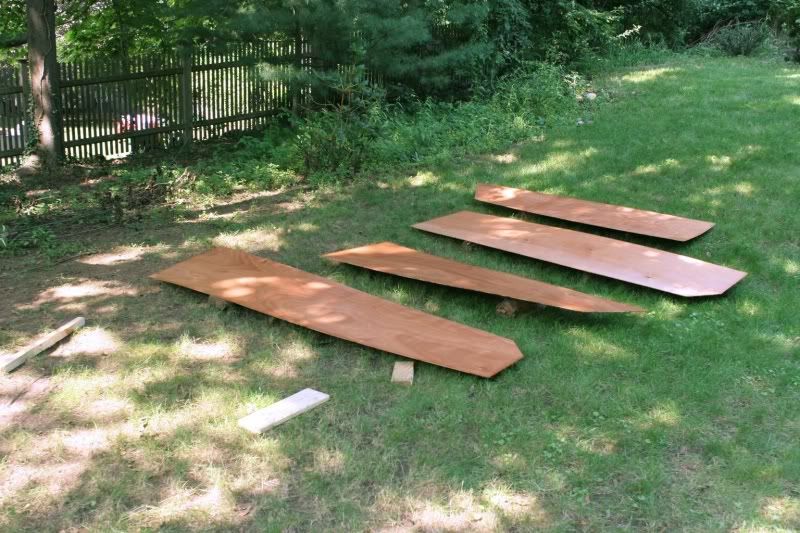
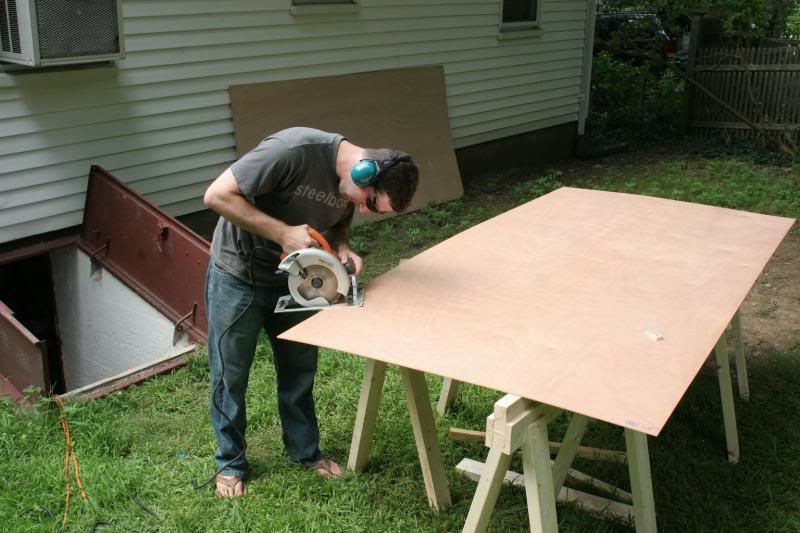
Then it was time to cut out the hull side panels and clean them up to serve as a template for the marking the rest.


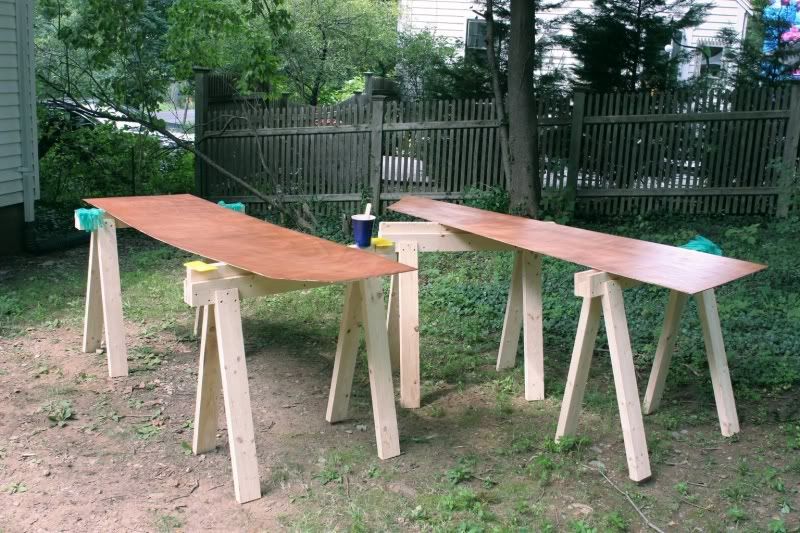
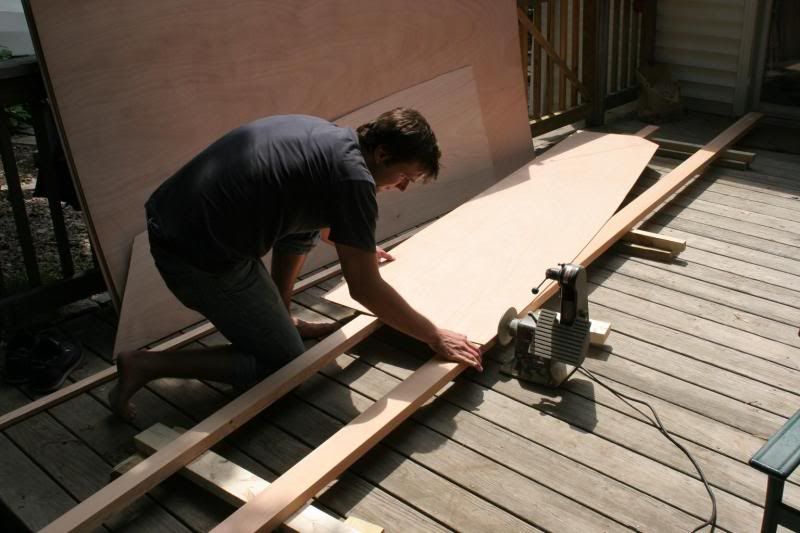
We set up a temporary frame on the deck using the douglas fir boards that would eventually become the keels and stringers to slide the panels by the sander. Once the shape was close we finished by hand with a sanding block right to the pencil lines.


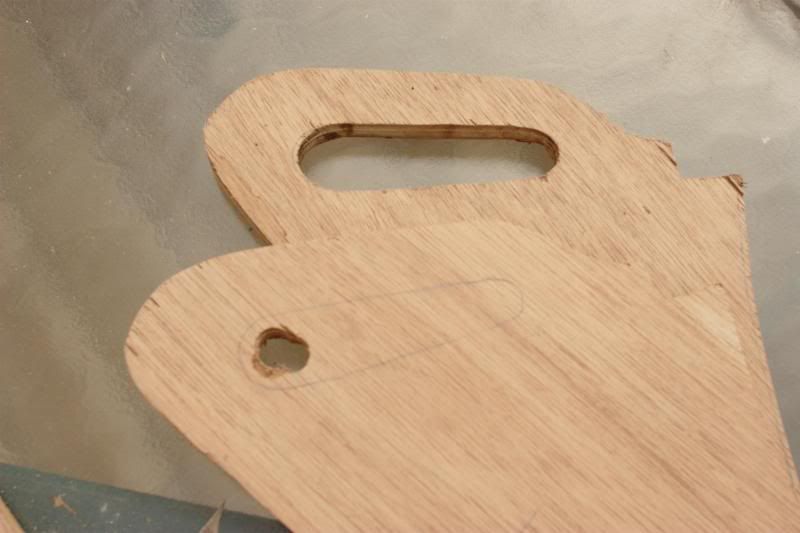
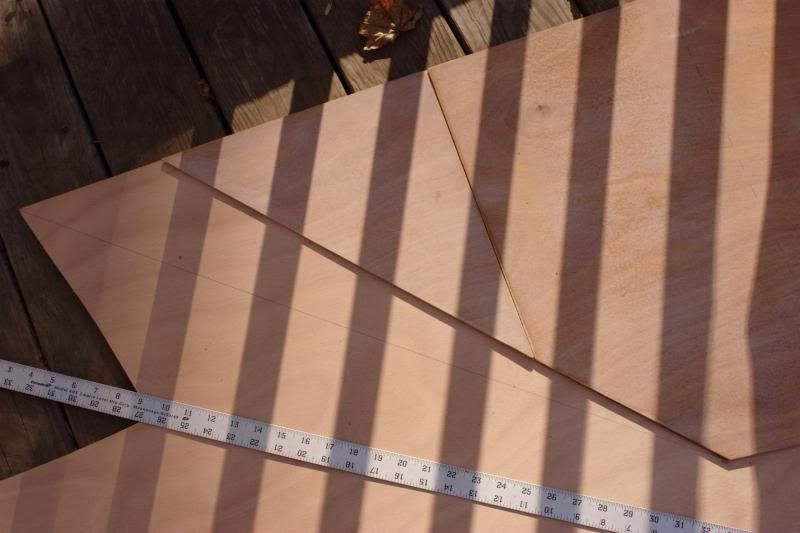
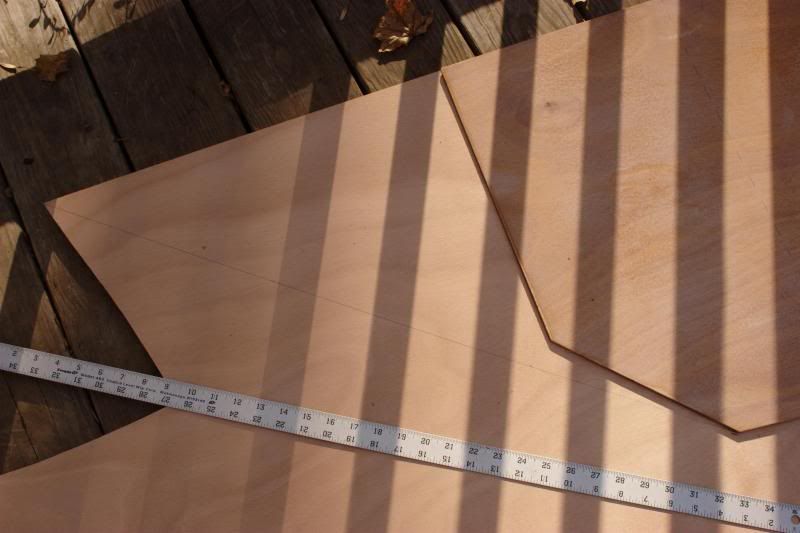
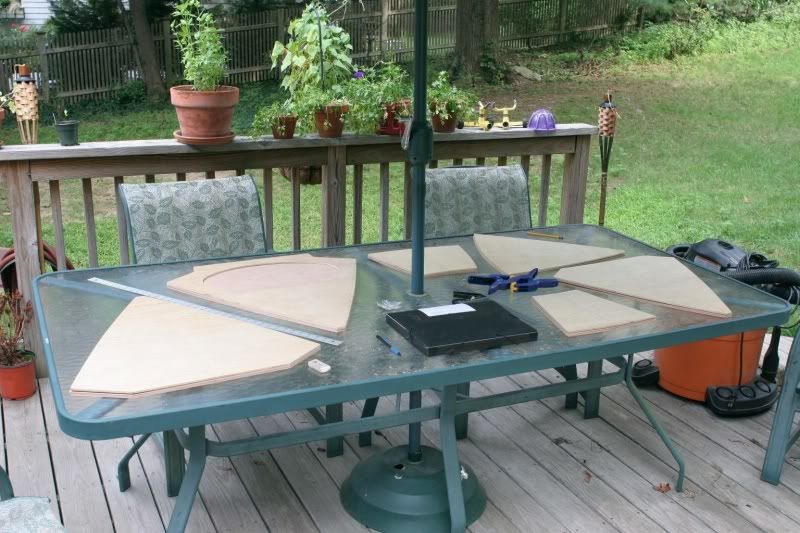
Next we used the first set of hull panels to mark and rough cut the other three pairs. We didn't want to waste any plywood (the irony!) by mixing up which sheet had been used for fore or aft panels so we laid out the bulkhead templates based on the layout guide in the plans and cut them out as well. Unfortunately we marked them out on all eight sheets instead of the four sheets required.

Lesson learned - if it's hot and you're tired and in a hurry to make progress, you're likely to make mistakes. We slowed down substantially after we realized what we had done and made sure to re-consult the plans at every step.

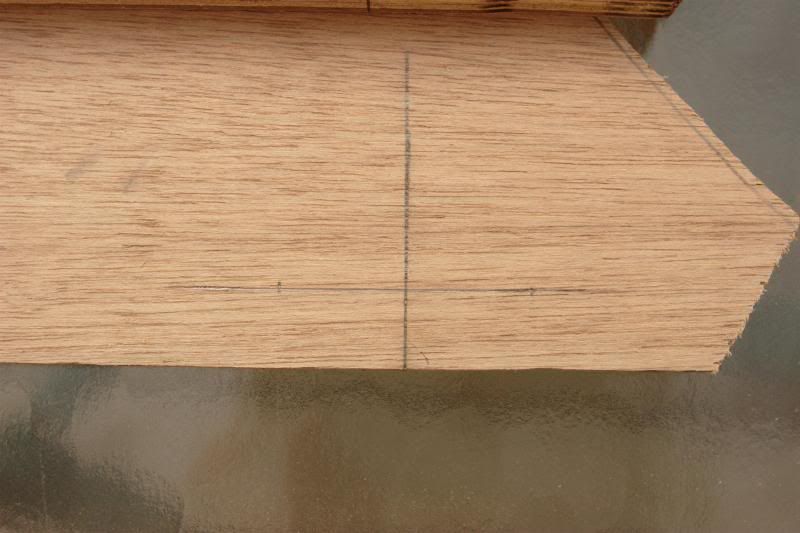
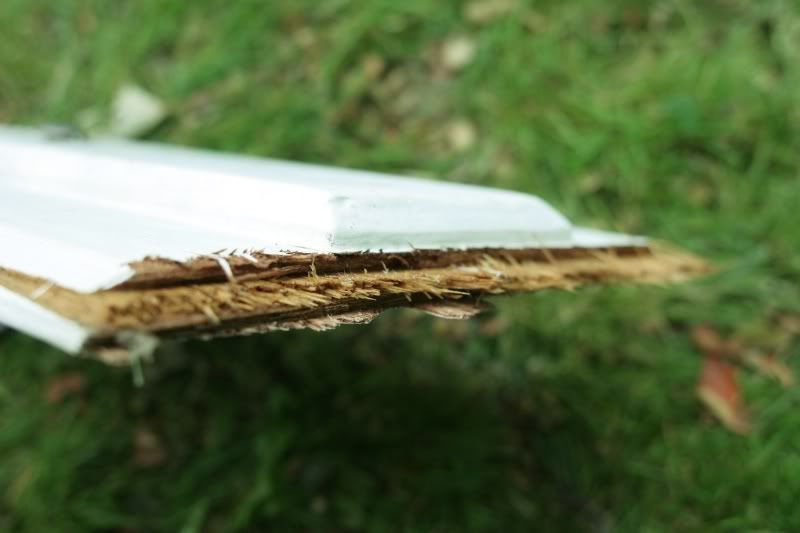
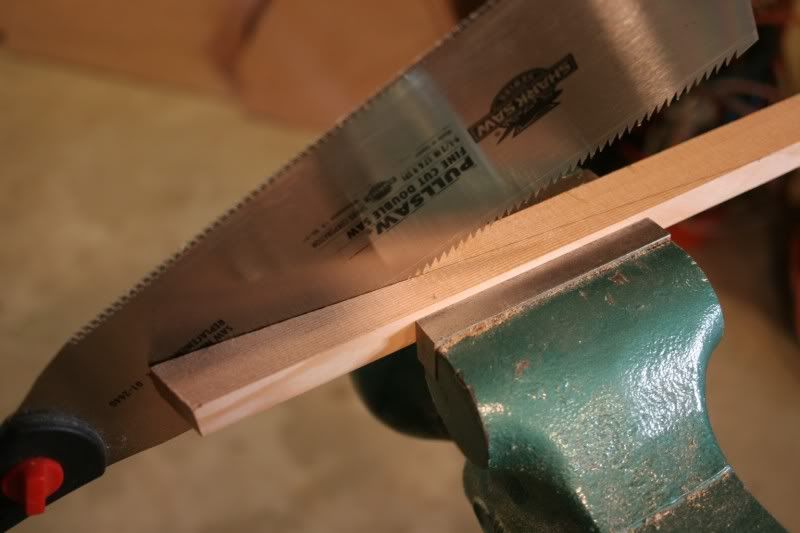
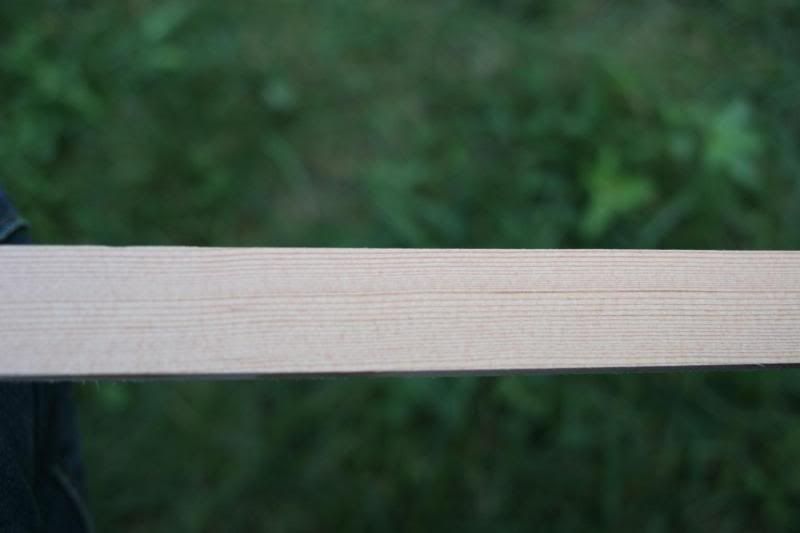
Next we took a break from the plywood and started to re-saw the douglas fir into the 3/4" x 1/2" keels and 1" x 1/2" stringers. Here you can see the grain spacing on a 1" wide strip.


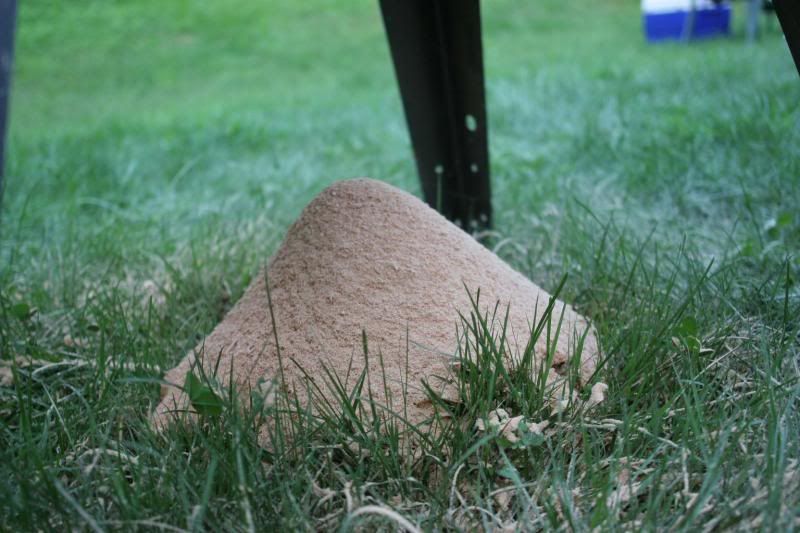
By the time we were done re-sawing it was time to call it a day and to clean up the small mountain of sawdust under the table saw.


Tomorrow all the hull panels will get cleaned up on the router table and then coated in epoxy.