Alrighty Folks,
Finally sucked it up and got back to work on the Hitia. Its a little bit tight in the garage space, but with the help of my latest recruit, Tyler, we were able to keep working on the front beam and paint the inside of the second hull.
Here's a picture of the beam as it sits right now:
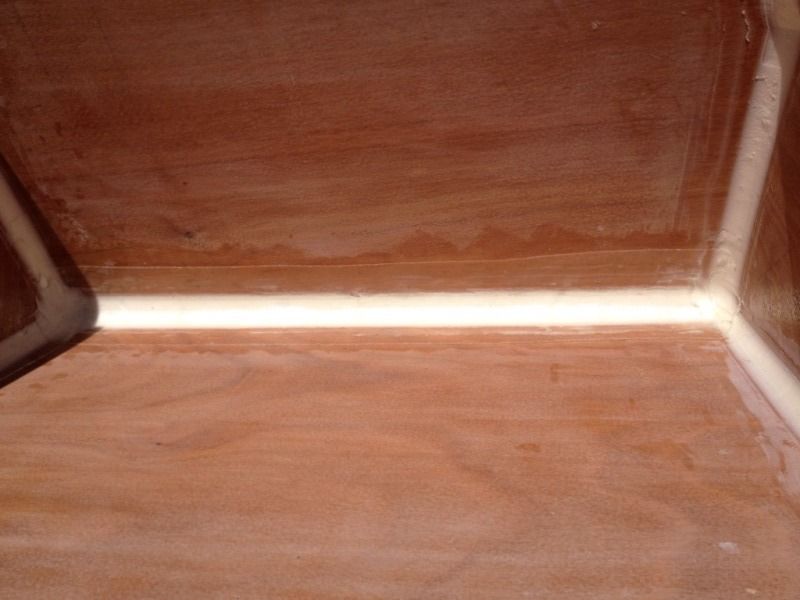
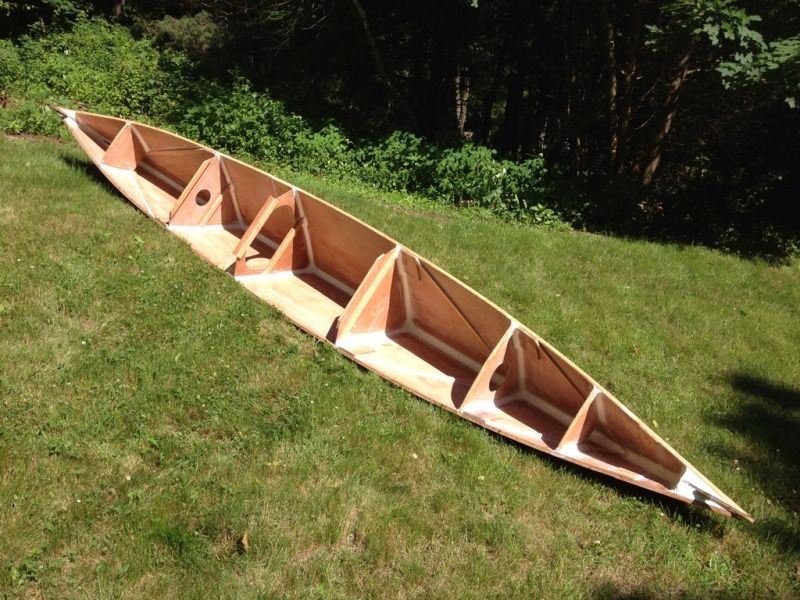
And here is one of the inside of the second painted hull:
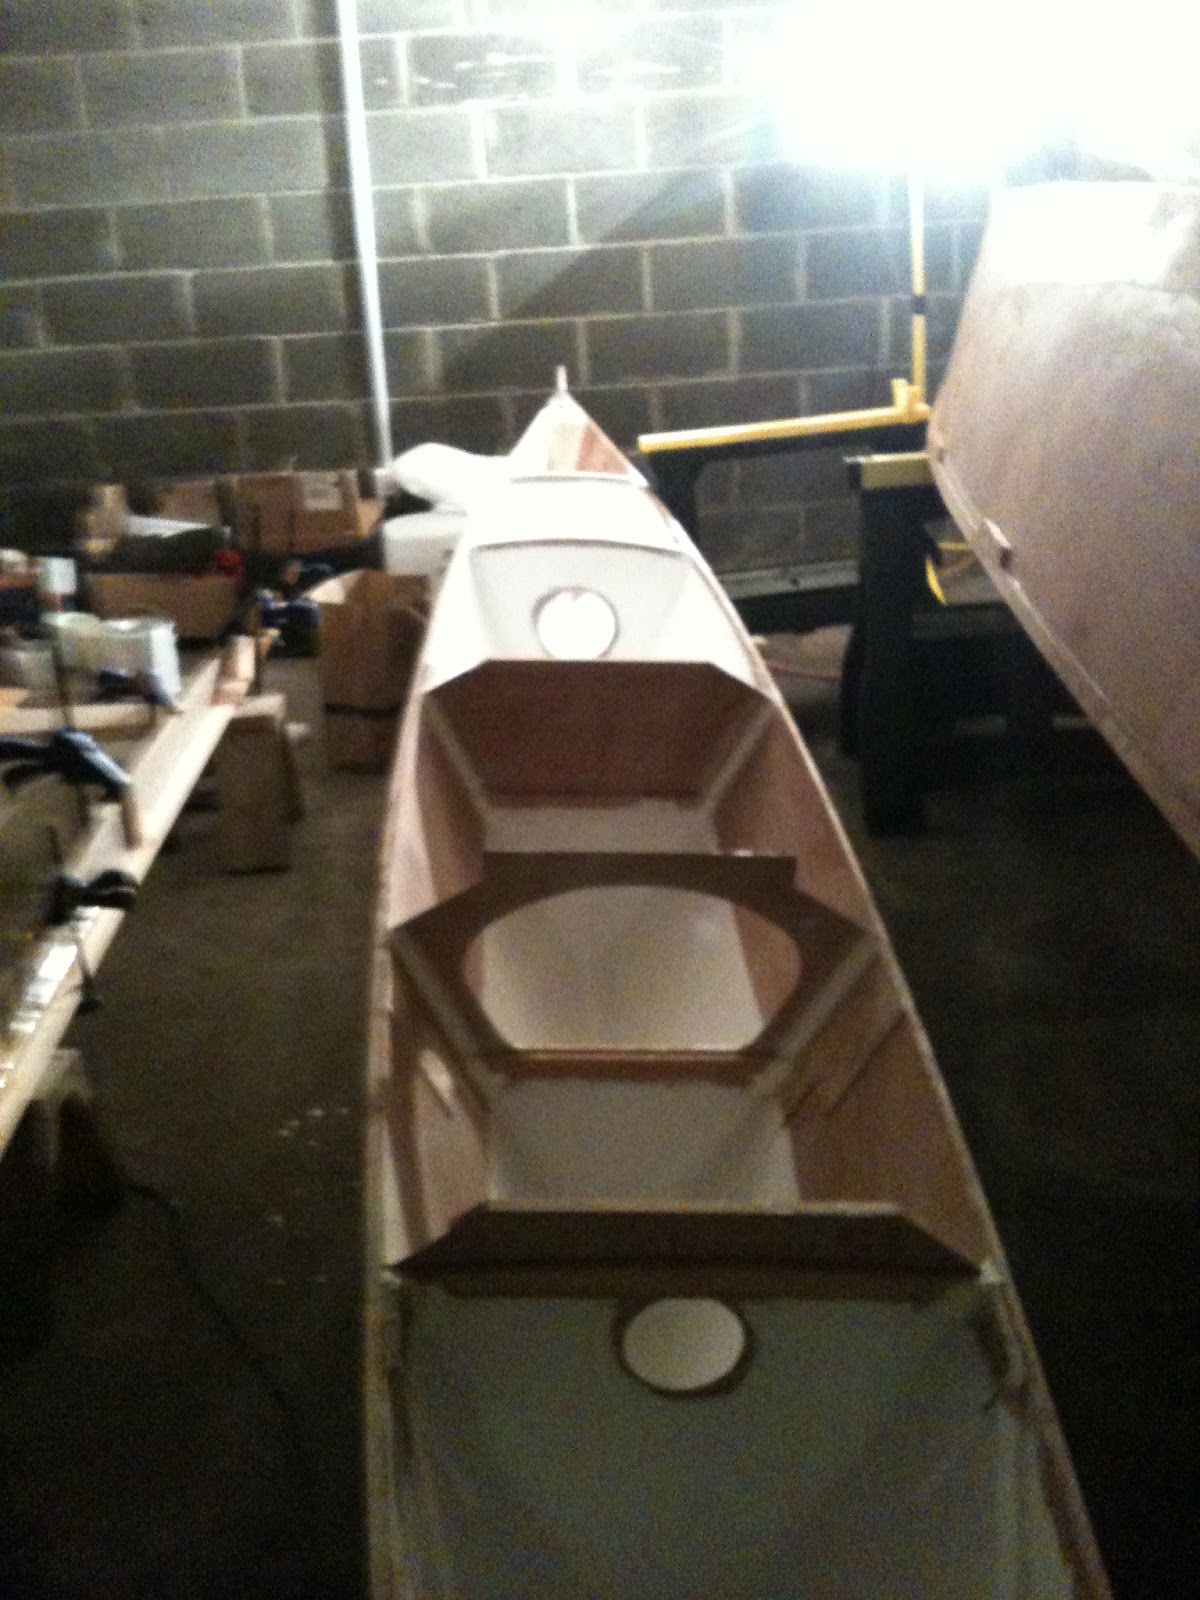
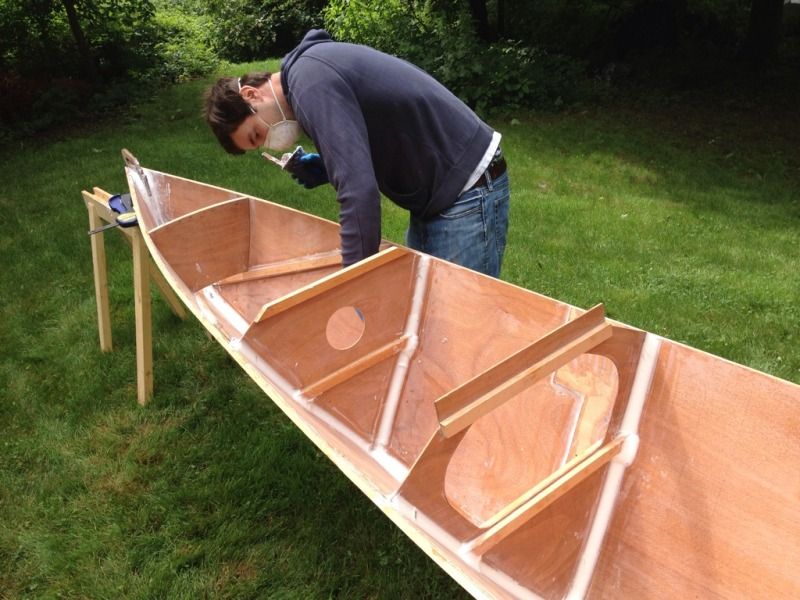
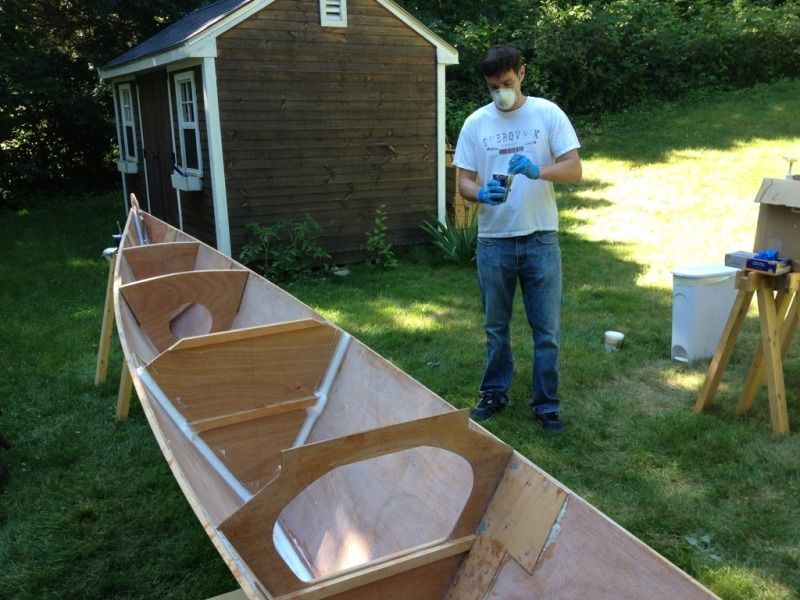
We left some unpainted space for the floors and for the eventual installation of the hatches. I was hoping to be able to start working on glassing the outside rather than painting, but it was too cold to work with that much epoxy and I didn't want to do a sloppy job with the fiberglass cloth. So I opted to paint the hull instead, and set up the flood lights and the radiator next to the beam to help it cure up. Then I got out of there because the paint fumes were giving me a headache.
After lunch I came back and was especially glad I didn't glass the hull. I had over done it with the heaters and lamps and blew out the power. I couldn't get in to the room housing the fuse box, so I had to leave the beam as she was. Hopefully that quick hardener works in those low temperatures as advertised!
If anyone has any experience working with epoxy in low temperatures (about 40 degrees F) I'd appreciate any tips.
Anyway, its a bit ghetto, but I'm glad to be back at work on the Hitia. Hopefully the groundhog was right and we're headed for an early spring and some warmer days!
Showing posts with label Hulls. Show all posts
Saturday, February 2, 2013
Wednesday, August 8, 2012
Fiber glassing the hulls
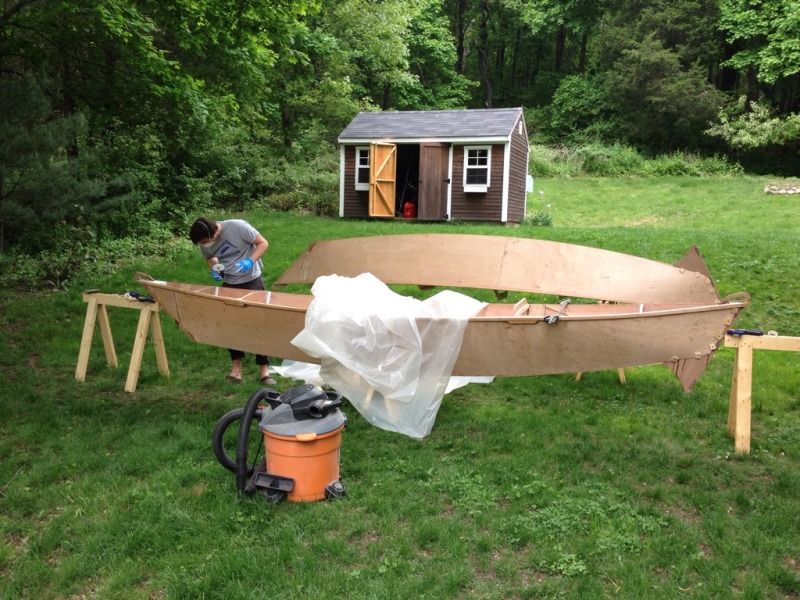
Now that the hulls are assembled they won't fit back into the basement any more. It's been ok to keep them outside so far but the sunshine won't last forever so we are moving up the fiber glassing job to protect them while they are out in the weather.
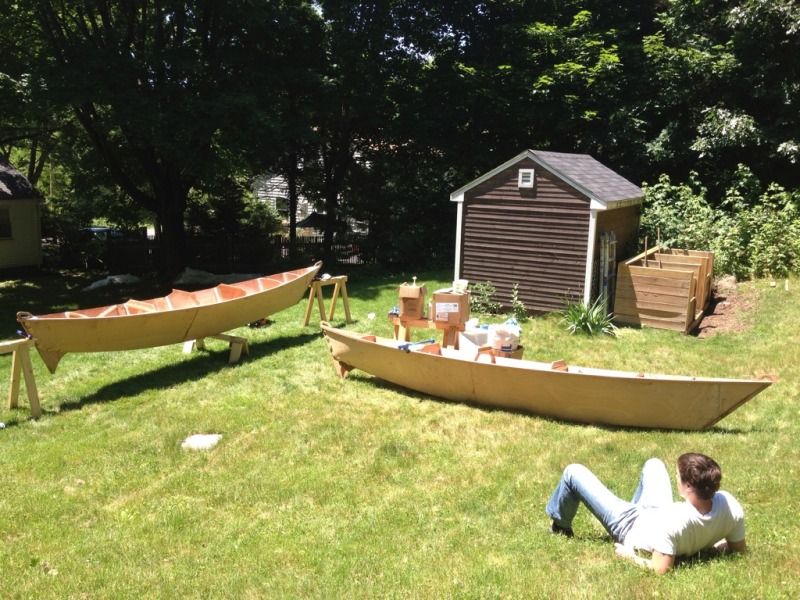
The paint job looks a bit messy up on the saw horses but all those areas won't show.
All the stitches are out and the keel has been rounded over so we can put a piece of glass tape along the keel joint. This area is going to get the most abuse pulling the boat up on beaches so it gets a triple layering of fiberglass. The first layer is this tape and then the two side pieces will overlap over keel as well. We also put a bead of epoxy down to build up the radius and add more protection to the wooden keel strip.
Next we unrolled the 4oz fiberglass over the size of the hull and tacked it in place some epoxy where we couldn't hold it with tape.
Then we finally got down to spreading on the epoxy. We had been dreading the fiber glassing job and what would happen if we messed it up but it really wasn't that bad.
The fiberglass cloth does want to wrinkle as it laps over the curved edge of the keel but we kept at it and got all the wrinkles spread out.
The fiberglass also wraps up onto the skeg and smooths out the transition. This area is probably going to require some filler and sanding later but is looking pretty good.
We also had to notch the cloth around the lash pad supports. We ended up just glassing down to the edge and trimming with a razor blade which made a pretty clean edge.
Then we just had to keep moving back between the two hull as each fiberglass job cured.
The paint job looks a bit messy up on the saw horses but all those areas won't show.
All the stitches are out and the keel has been rounded over so we can put a piece of glass tape along the keel joint. This area is going to get the most abuse pulling the boat up on beaches so it gets a triple layering of fiberglass. The first layer is this tape and then the two side pieces will overlap over keel as well. We also put a bead of epoxy down to build up the radius and add more protection to the wooden keel strip.
Next we unrolled the 4oz fiberglass over the size of the hull and tacked it in place some epoxy where we couldn't hold it with tape.
Then we finally got down to spreading on the epoxy. We had been dreading the fiber glassing job and what would happen if we messed it up but it really wasn't that bad.
The fiberglass cloth does want to wrinkle as it laps over the curved edge of the keel but we kept at it and got all the wrinkles spread out.
The fiberglass also wraps up onto the skeg and smooths out the transition. This area is probably going to require some filler and sanding later but is looking pretty good.
We also had to notch the cloth around the lash pad supports. We ended up just glassing down to the edge and trimming with a razor blade which made a pretty clean edge.
Then we just had to keep moving back between the two hull as each fiberglass job cured.
Tuesday, June 19, 2012
Cutting the decks and floors
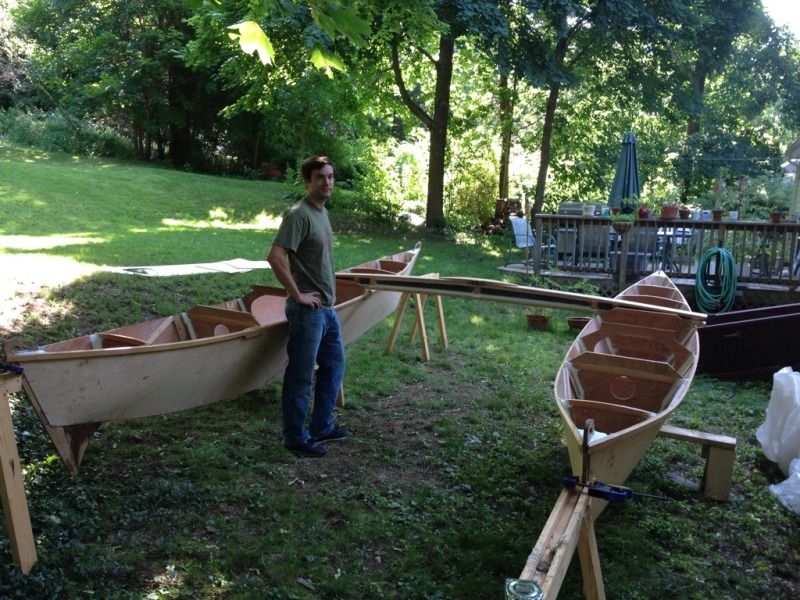
Another free day so we're keeping the momentum going. The hulls were already set up at their proper distance to get a sense of scale so we couldn't help but throw the main beam on to see how it looks. But enough daydreaming, today we are making the floors, fore decks, aft decks and side decks.
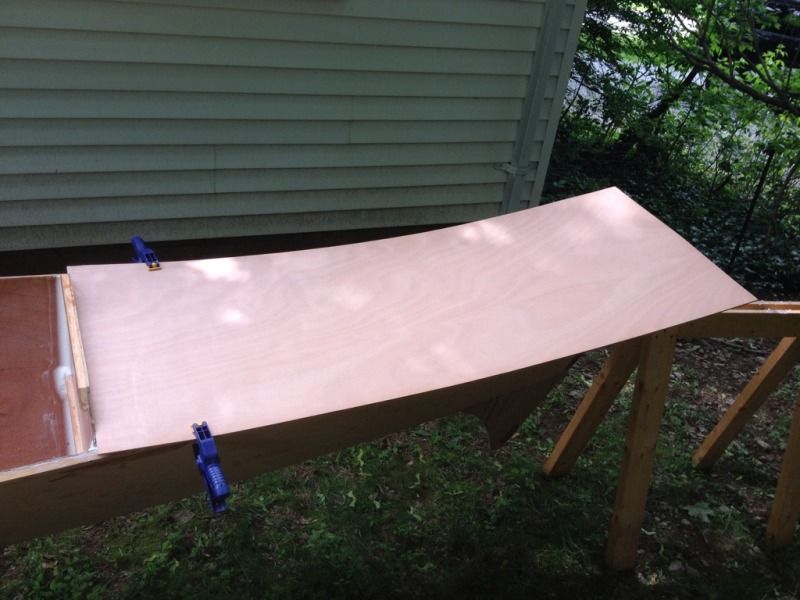
Here is our process for making the main decks. We start with a piece about the right size and put a straight edge up against the bulkhead. Clamps hold it tight against the bulkhead and centered across the hull.
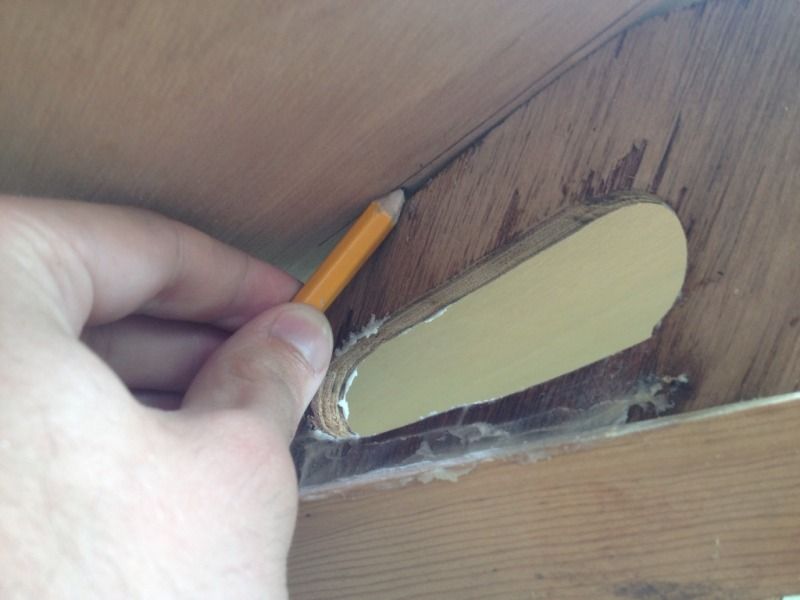
The stem location is marked on the underside holding the edge of the pencil point flush with the plywood.
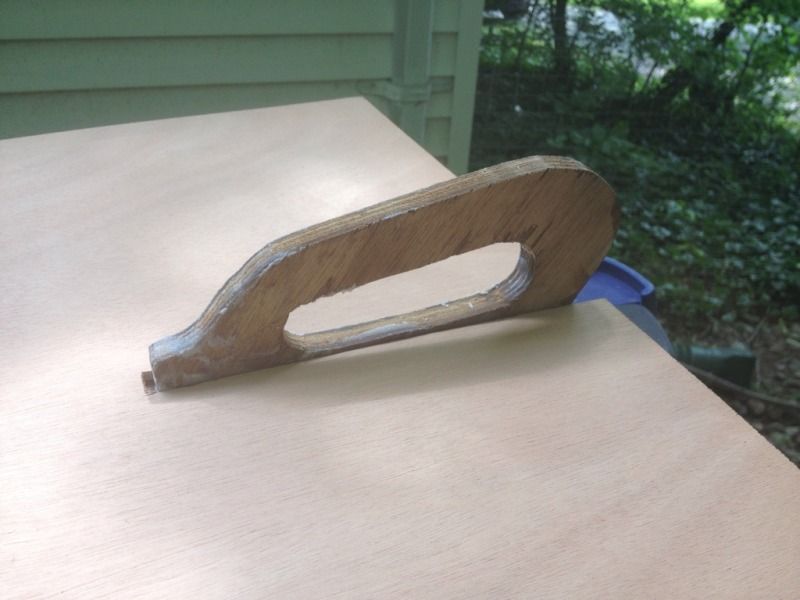
Then cut out the slot and fit it over the stem handle. Next it's pretty straight forward to mark the edges of the hull and trim it down with the jig saw.
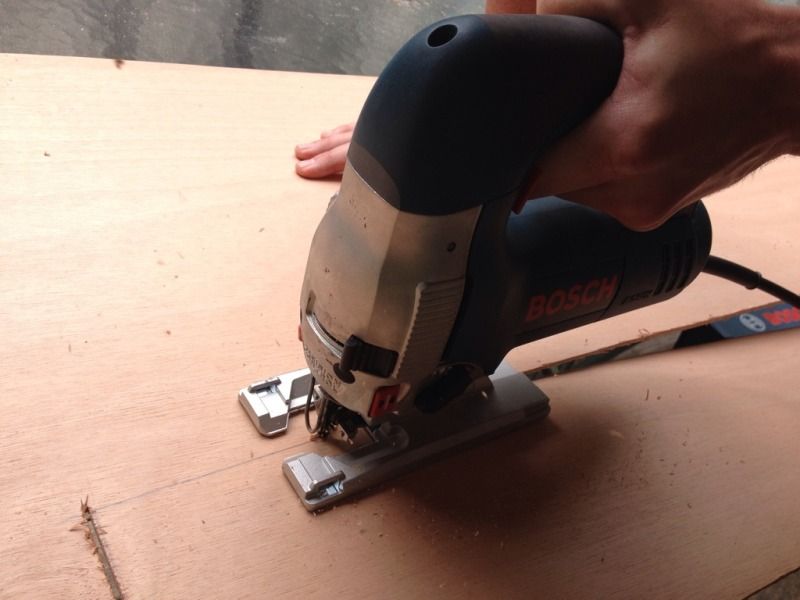
Speaking of the jig saw, this is my new Bosch saw which got quite a workout today. I can't believe we made it this far without one and this one is very heavy duty which helps with making nice smooth cuts.
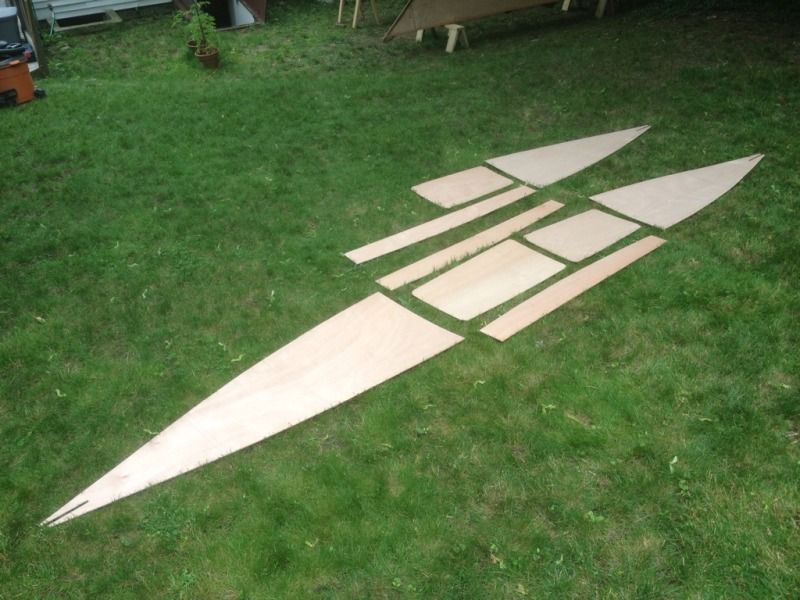
So after all that jig sawing this is what we have to show for it: noth aft decks, both aft floors, three side decks, one front floor and one front deck.
Next up: more epoxy coating, gluing on more fir stringers and back to the lumber store for another sheet of Okoume plywood. Pretty soon we'll be painting the interior and under sides of the decks to get them ready for glue and fiber glassing over the floors.
The first order of business was bringing out the scraps of plywood and seeing what we could get out of each piece to best use the material we had left. We knew after cutting all the bulkheads twice that we wouldn't have enough to finish, but we would like to buy as little extra as possible.
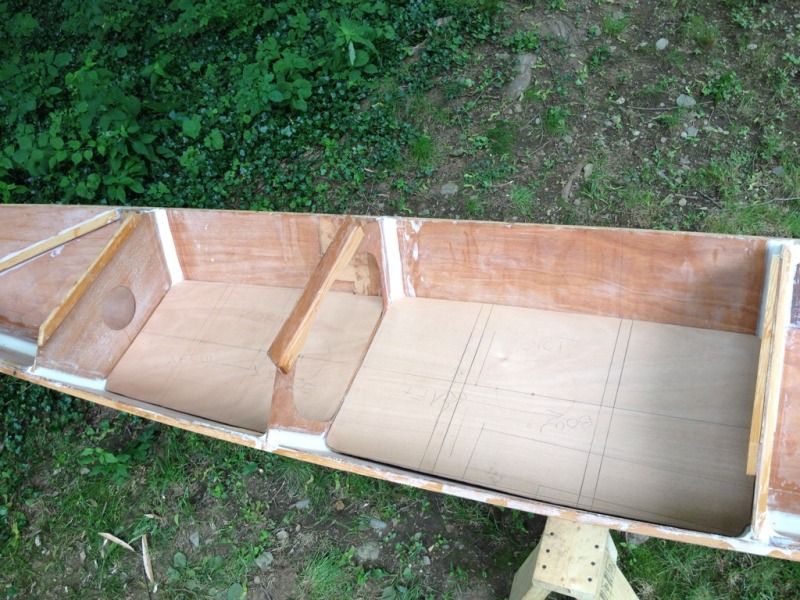
The first pieces cut were the floors. These two floors should be almost the same length according to the plans, but bulkhead 5 which forms the aft face of the aft most floor is about 5" too far forward. Not sure how this happened but we're going with it and will change some of the details on the hatches to make it all look right. The mast will be in the right place and that's what counts so hopefully we don't miss the extra seating space too much. In the end I don't think anyone will notice.
Here is our process for making the main decks. We start with a piece about the right size and put a straight edge up against the bulkhead. Clamps hold it tight against the bulkhead and centered across the hull.
The stem location is marked on the underside holding the edge of the pencil point flush with the plywood.
Then cut out the slot and fit it over the stem handle. Next it's pretty straight forward to mark the edges of the hull and trim it down with the jig saw.
Speaking of the jig saw, this is my new Bosch saw which got quite a workout today. I can't believe we made it this far without one and this one is very heavy duty which helps with making nice smooth cuts.
So after all that jig sawing this is what we have to show for it: noth aft decks, both aft floors, three side decks, one front floor and one front deck.
Next up: more epoxy coating, gluing on more fir stringers and back to the lumber store for another sheet of Okoume plywood. Pretty soon we'll be painting the interior and under sides of the decks to get them ready for glue and fiber glassing over the floors.
Thursday, June 14, 2012
The even bigger gluing day
It's been a long time since we were able to work on the boat and it was time for a big push. The last big push only accomplished about a quarter of what we set out to do. But the days have gotten much longer and today we weren't going to stop until all the fillets were in both hulls and all the keel joints were fiber glassed.
The first hull was already half filleted, so the remaining fillets went pretty quickly. Part of the speed increase was because we moved our epoxy mixing station outside near where we were working to cut down on trips to the basement.
Before we knew it the first hull was fully filleted and ready for fiberglass.
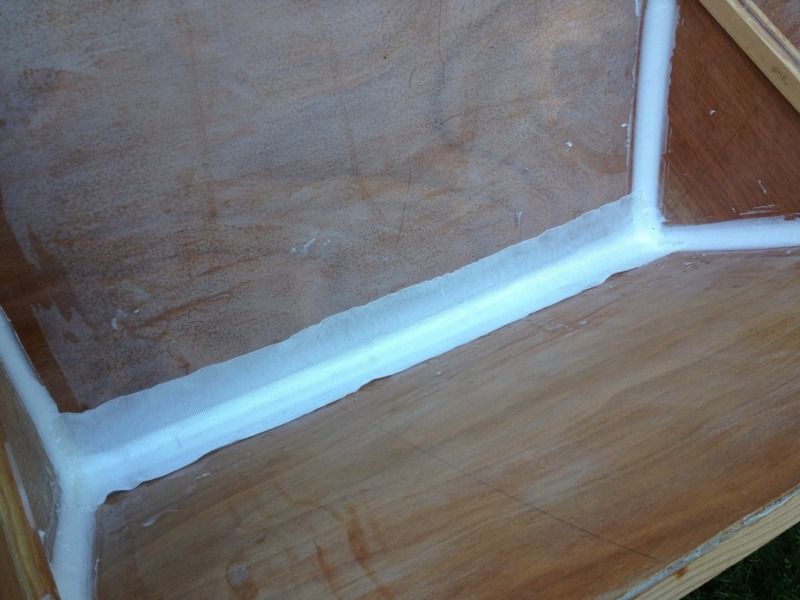
Most of the keel joints were fresh so we were able to press in the fiberglass tape while the epoxy was the consistency of a firm gel. This made smoothing out any bumps or edges easy and let the fiberglass sit nice and smooth against the fillet without any sanding.
Then we brushed on epoxy with a 2" chip brush and worked the tape with a gloved finger like a squeegee. All in all this was much easier than we thought it would be. The only trouble was a bit of unraveling at the ends when we were a bit rough with the tape.
By lunch time the first hull was filleted and taped and curing in the sun.
So we could take a small break, looked out over our work and get psyched up for the next round. The second hull had no epoxy at all, and we had about 6 hours of daylight to finish it.
After lunch the first hull was cured enough to move off the saw horse and finish curing in the sun.
The second hull went just like the first with two exceptions. First, at the filleting stage we filled the stems in three to four passes to prevent excess heat buildup. Second, we worked one 'bay' at a time doing keel, then bulkheads and then glassed the keel. That way as we moved down the boat we left the previous segment complete. Here we have just completed the middle segment and are about to put another layer in the stems.
By the time we brushed epoxy on the last piece of fiberglass the sun was hanging low in the sky but we had reached our goal. We cleaned up our mess and called it a day.
The first hull was already half filleted, so the remaining fillets went pretty quickly. Part of the speed increase was because we moved our epoxy mixing station outside near where we were working to cut down on trips to the basement.
Before we knew it the first hull was fully filleted and ready for fiberglass.
Most of the keel joints were fresh so we were able to press in the fiberglass tape while the epoxy was the consistency of a firm gel. This made smoothing out any bumps or edges easy and let the fiberglass sit nice and smooth against the fillet without any sanding.
Then we brushed on epoxy with a 2" chip brush and worked the tape with a gloved finger like a squeegee. All in all this was much easier than we thought it would be. The only trouble was a bit of unraveling at the ends when we were a bit rough with the tape.
By lunch time the first hull was filleted and taped and curing in the sun.
So we could take a small break, looked out over our work and get psyched up for the next round. The second hull had no epoxy at all, and we had about 6 hours of daylight to finish it.
After lunch the first hull was cured enough to move off the saw horse and finish curing in the sun.
The second hull went just like the first with two exceptions. First, at the filleting stage we filled the stems in three to four passes to prevent excess heat buildup. Second, we worked one 'bay' at a time doing keel, then bulkheads and then glassed the keel. That way as we moved down the boat we left the previous segment complete. Here we have just completed the middle segment and are about to put another layer in the stems.
By the time we brushed epoxy on the last piece of fiberglass the sun was hanging low in the sky but we had reached our goal. We cleaned up our mess and called it a day.
Saturday, May 12, 2012
The big glue day - Part 2
Earlier in the day we put down two layers of epoxy around the keel and stems, the first layer raw and the next mixed to a runny consistency with milled fiberglass. These layers were to seal down in all the nooks and crannies before adding the fillets to make sure there are no voids. Now that these layers are cured and our lunch break is over it's time to get epoxying again. Doesn't look like we are going to get through both hulls like we thought and turns out we didn't even get the one hull fully filleted.
We had trouble with bugs and leaves falling out of the tree the areas we weren't currently working on were covered with plastic.
I miss read the plans when drilling out plywood fillet smoothing tools and mistook a radius for a diameter and so the first attempts at hull fillets were half the proper size. Compare the ones on the right which is what we started doing, with those on the left which are correct. Glad we caught our mistake early!
The stems take up a huge amount of epoxy to fill but end up very strong and solid. We made the mistake of applying all this fillet in one go which caused the epoxy to get very hot. In the future we will build up to thicknesses like this in multiple passes.
By the time the sun was going down we had only made it through half of one hull. Not the kind of progress we were hoping for if this boat is going to take us sailing this season.
We had trouble with bugs and leaves falling out of the tree the areas we weren't currently working on were covered with plastic.
I miss read the plans when drilling out plywood fillet smoothing tools and mistook a radius for a diameter and so the first attempts at hull fillets were half the proper size. Compare the ones on the right which is what we started doing, with those on the left which are correct. Glad we caught our mistake early!
The stems take up a huge amount of epoxy to fill but end up very strong and solid. We made the mistake of applying all this fillet in one go which caused the epoxy to get very hot. In the future we will build up to thicknesses like this in multiple passes.
By the time the sun was going down we had only made it through half of one hull. Not the kind of progress we were hoping for if this boat is going to take us sailing this season.
The big glue day - Part 1
The big day of gluing is finally here. The temperature is up and no rain in the forecast means it's time to get busy on our gluing ordeal. With any luck we can get all the rounds of gluing in one after the other in one drawn out process and then be done with it.
First the hulls need to come back out of the basement one more time and get set up at working height.
The aft stems were never stitched and so I attempted to do that while also pulling the panels into alignment. There is so much tension in the hull panels from the twisting that I couldn't get the stitches to hold so I went with screws instead which worked out much easier and pulled the hull panels in tight with the stem. This photo is after the gluing surfaces got a coat of raw epoxy to soak down into the nooks and crannies so that is where the small drips are coming from.
Now is also the time to check that everything is straight and level. With hardly any adjusting the hulls were perfectly lined up.
The gaps along the keel and stem are epoxied with a milled fiberglass and silica mix. These batches were mixed pretty loose so that they can settle into the gaps and make sure there are no voids.
More of the first glue round along the keel ...
Now we wait until this layer sets up and then the big fillets along the keel and bulkheads will follow. After the fillets dry if there is any daylight left we will epoxy in the fiberglass tape over the keel fillet.
To be continued ...
First the hulls need to come back out of the basement one more time and get set up at working height.
The aft stems were never stitched and so I attempted to do that while also pulling the panels into alignment. There is so much tension in the hull panels from the twisting that I couldn't get the stitches to hold so I went with screws instead which worked out much easier and pulled the hull panels in tight with the stem. This photo is after the gluing surfaces got a coat of raw epoxy to soak down into the nooks and crannies so that is where the small drips are coming from.
Now is also the time to check that everything is straight and level. With hardly any adjusting the hulls were perfectly lined up.
The gaps along the keel and stem are epoxied with a milled fiberglass and silica mix. These batches were mixed pretty loose so that they can settle into the gaps and make sure there are no voids.
More of the first glue round along the keel ...
Now we wait until this layer sets up and then the big fillets along the keel and bulkheads will follow. After the fillets dry if there is any daylight left we will epoxy in the fiberglass tape over the keel fillet.
To be continued ...
Sunday, April 29, 2012
All stitched up
Our catamaran is all stitched up. It's not as convenient to work on as a double-decker. Thant's ok though because there is no other way to fit the two hulls in the basement at the moment.
The top hull is held up temporarily with some scrap wood and clamps.
Here are some more details that are pretty obvious when your are stitching, but aren't in the plans. The plans give a measurement for how to cut the angle on the end of the sheer stringer, but it's much easier to clamp in place and cut parallel to the stem.
The other complication is the supports on the bulkheads are on the narrower side. So they need to be beveled to match the angle of the hull to sit flush.
Right now the sides are not sitting exactly right on the aft stem on both hulls. At least they are both the same. I think we can pull it into alignment using a rope tied to the front stem handle. It probably doesn't make much difference but I want to make sure that the deck will line up with the bottom of the handle,
That's all for now. I predict that there is a lot more gluing in our future
The top hull is held up temporarily with some scrap wood and clamps.
Here are some more details that are pretty obvious when your are stitching, but aren't in the plans. The plans give a measurement for how to cut the angle on the end of the sheer stringer, but it's much easier to clamp in place and cut parallel to the stem.
The other complication is the supports on the bulkheads are on the narrower side. So they need to be beveled to match the angle of the hull to sit flush.
Right now the sides are not sitting exactly right on the aft stem on both hulls. At least they are both the same. I think we can pull it into alignment using a rope tied to the front stem handle. It probably doesn't make much difference but I want to make sure that the deck will line up with the bottom of the handle,
That's all for now. I predict that there is a lot more gluing in our future
Saturday, April 28, 2012
Diagonal hull stiffeners
The next step after stitching in the bulkheads is to add diagonal stiffeners to brace the thin hull panels. The diagonals go on the two fore sections and the one aft section of hull. The middle sections get their bracing from the floor structure. Here is a diagram showing the diagonal bracing in bright green and how it ties the keel and stem structure up to the sheer.
I cut each piece to fit and then made sure I had scraps the right length to use as bracing. Everything went smoothly in the test fit so I moved on to gluing. Funny how everything seems to stop going according to plan once you slather on the epoxy.
The epoxy got rid of the stiffener to hull friction so the clamping pressure kept trying to slide the pieces up and out of the hull. Adding staples or clamps near the sheer fixed the problem. The plans call for stitching these in but we have already drilled enough holes in our hulls and the stitches wouldn't have provided enough clamping pressure anyway.
Installation started in the bow section ...
.. then the next section aft ...
... and finally the aft section.
This hull is ready for fillets! One down, one to go.

I cut each piece to fit and then made sure I had scraps the right length to use as bracing. Everything went smoothly in the test fit so I moved on to gluing. Funny how everything seems to stop going according to plan once you slather on the epoxy.
The epoxy got rid of the stiffener to hull friction so the clamping pressure kept trying to slide the pieces up and out of the hull. Adding staples or clamps near the sheer fixed the problem. The plans call for stitching these in but we have already drilled enough holes in our hulls and the stitches wouldn't have provided enough clamping pressure anyway.
Installation started in the bow section ...
.. then the next section aft ...
... and finally the aft section.
This hull is ready for fillets! One down, one to go.
Sunday, April 22, 2012
At long last a boat
Yesterday was the most gratifying build day yet, we can finally see the shape of one of the hulls! We have put so many hours into the pieces and prep work and it is finally starting to come together. We wanted to stitch the bulkheads into both hulls but ran out of both time and copper wire so this is all for now.
The shape is surprisingly sophisticated for a v-bottomed canoe. The flat edge of the hull panel transforms into a nice sheer line with a sharp entry and curved aft sections.
The last bulkhead was the most difficult to fit. There is a lot of curve in the plywood hulls and a lot of tension getting the bulkhead into place. The stitching holes in the bulkheads are offset ~1/2" above the hull stitching holes which pulls the bulkhead down into the hull as the stitches are tightened.
Here is a view from the stern. The clamp is distorting the shape of the sheer a bit but we'll fix that when the stern stem stitches are in.
Now it finally looks like a boat!
Stitching took longer than we though (like everything else so far on this boat!) so the second hull will have to wait for another day.
With no real work left to do we held up one of the unfinished beams so we could stand in the right spots and imagined laying out on the deck, sails set cruising the Boston harbor islands, the Cape and beyond.
The shape is surprisingly sophisticated for a v-bottomed canoe. The flat edge of the hull panel transforms into a nice sheer line with a sharp entry and curved aft sections.
The last bulkhead was the most difficult to fit. There is a lot of curve in the plywood hulls and a lot of tension getting the bulkhead into place. The stitching holes in the bulkheads are offset ~1/2" above the hull stitching holes which pulls the bulkhead down into the hull as the stitches are tightened.
Here is a view from the stern. The clamp is distorting the shape of the sheer a bit but we'll fix that when the stern stem stitches are in.
Now it finally looks like a boat!
Stitching took longer than we though (like everything else so far on this boat!) so the second hull will have to wait for another day.
With no real work left to do we held up one of the unfinished beams so we could stand in the right spots and imagined laying out on the deck, sails set cruising the Boston harbor islands, the Cape and beyond.
Thursday, March 29, 2012
Stitching the hulls
We have been working on the boat since last June and today we are finally done with Sheet 1 of the plans! The hulls are now stitched together and ready for the bulkheads just in time for the warmer weather. We are pretty far along with other bits and pieces but we still haven't seen anything that looks like a boat, until today.
But before starting to stitch, we found mistake #3 with the bow panels. We made the top side too long which means the stem wouldn't fit. Something about the measurements on the plans didn't add up because the measurement from the edge of the ply was right, but the measurement from the bulkhead was wrong. You can see that we have to take off a small triangle from the front which was pretty easy with the pull saw, then used a chisel to bevel the edge of the butt block.
We also drilled the rudder lashing holes on the drill press before attaching the aft stems. These were a bit messy for our taste and so the next ones were done with a piece of wood clamped to the drill press table as a fence to keep the holes more neatly aligned.
And then it was time to start putting in stitches of copper wire! Here are the stitches along the bow. You can see how narrow the filler piece is now that we cut it down. The stitches in that area go through the main hull panel so we don't rip open that seam when the hulls are opened out.
We then stitched the aft stem and keel.
We couldn't help but open it up with one bulkhead and see what it will look like.
Check it out, it's a boat!
The bulkheads are just fit loose for now to see how they fit and if the stitches are the right tension. We will probably need to loosen the stitches along the keel to make sure it isn't twisted. Each additional bulkhead makes the shape prettier and prettier.
Unfortunately we will probably put the stitched hulls aside and go back to the beams and other small pieces while we wait for the fiberglass tape to be delivered and for a warm weekend day. Our plan is to do all the epoxy, fillets and fiberglass tape in one continuous process. It won't be this weekend and it won't be next weekend so perhaps the weekend after we'll have some glued up hulls.
But before starting to stitch, we found mistake #3 with the bow panels. We made the top side too long which means the stem wouldn't fit. Something about the measurements on the plans didn't add up because the measurement from the edge of the ply was right, but the measurement from the bulkhead was wrong. You can see that we have to take off a small triangle from the front which was pretty easy with the pull saw, then used a chisel to bevel the edge of the butt block.
We also drilled the rudder lashing holes on the drill press before attaching the aft stems. These were a bit messy for our taste and so the next ones were done with a piece of wood clamped to the drill press table as a fence to keep the holes more neatly aligned.
And then it was time to start putting in stitches of copper wire! Here are the stitches along the bow. You can see how narrow the filler piece is now that we cut it down. The stitches in that area go through the main hull panel so we don't rip open that seam when the hulls are opened out.
We then stitched the aft stem and keel.
We couldn't help but open it up with one bulkhead and see what it will look like.
Check it out, it's a boat!
The bulkheads are just fit loose for now to see how they fit and if the stitches are the right tension. We will probably need to loosen the stitches along the keel to make sure it isn't twisted. Each additional bulkhead makes the shape prettier and prettier.
Unfortunately we will probably put the stitched hulls aside and go back to the beams and other small pieces while we wait for the fiberglass tape to be delivered and for a warm weekend day. Our plan is to do all the epoxy, fillets and fiberglass tape in one continuous process. It won't be this weekend and it won't be next weekend so perhaps the weekend after we'll have some glued up hulls.
Subscribe to:
Posts (Atom)